It is important to know the parts of hydroponic garden. These components are critical in operating a hydroponic system. We will be covering a few of these components. It is also important to know about the Nutrient Film technique and the Dutch bucket. We will also discuss the advantages of each type. Let's not forget about Hydroponics.
Aeroponics uses nutrient-rich aerosol
Aeroponic gardening involves a suspension of roots in nutrient-rich aerosol, and then they are exposed to oxygen. They absorb the nutrients and water from the aerosol that is sprayed onto their roots. The root system of the plant is supported by a hydroton clay ball or coco-coir soil alternative. Low-strength hydrogen oxide is used in the treatment of the water. During the growth process, roots are placed on top of an empty chamber and exposed to both air as well as nutrient-rich aerosol.
Aeroponic hydroponic systems are more efficient and sustainable than traditional hydroponic systems. The plants can also be transplanted easily. They are also less susceptible to diseases and pests than traditional hydroponic systems. Aeroponic systems are often enclosed in enclosures to prevent disease and pest outbreaks.
Aeroponics requires precision and attention. You must follow certain parameters to ensure that the water has the right amount of nutrients. Any equipment malfunction could result in a loss of harvest. You need to be careful about how often you sprinkle, as otherwise the roots can become dry. The misters should be cleaned frequently to prevent mineral deposits from clogging them.
Using an aeroponics system is an effective way to deliver nutrients and oxygen to plant roots. It allows the plant grow faster, reduces the need to soil, and encourages cloning. Aeroponics systems use less space that traditional hydroponic systems. They have exceptional yields, growth rates, and growth rate. There are many types of aeroponics systems on the market, including low-pressure and vertical systems.
Dutch bucket system
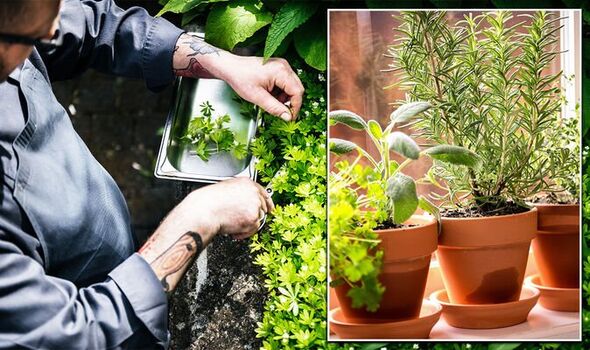
It is easy to create your own hydroponic gardening garden. You will only need the Dutch bucket system to create your hydroponic garden. To avoid algae growth, the Dutch bucket must be made of dark material. It is important to install appropriate bulkhead fittings, 8mm barbed-nipples and the industry-standard bulkhead fittings. Moreover, you should install shut-off valves to isolate plants when necessary.
First, measure the area where your growing medium is to be placed. Based on the number of containers you wish to place, you can cut a half-inch length of poly tubing. Connect the buckets to your drainpipe, and then install the emitter holes-equipped feeding tube. This is it! You're now ready to construct your own hydroponics systems.
The Dutch bucket system for hydroponics has the main advantages of being low-cost and easy to construct. It is also free from complicated hose-fittings and a central reservoir. Another benefit of this hydroponics system is that you only have to fill it once, saving you a lot of time and money. You should make sure that your water source and reservoir are clean if you're using this method. A too acidic or alkaline solution will not benefit your plants, so you should maintain a healthy pH balance for your reservoir.
The Dutch bucket method for hydroponic garden is a practical solution for large plants that need to be grown in small spaces. The water-based solution flows out of a designated reservoir and into the buckets. The excess solution is drained back into the reservoir once a bucket has filled. This irrigation system can contain multiple buckets. Extra solution can be pumped out through a drainage tube connected to each bucket.
Nutrient-film technique

Hydroponic gardening's nutrient-film method involves covering the roots with a nutrient mixture. This method was once considered to be the best because it allowed for optimal water control. The lack of substrate made optimization difficult. This technique can only be used for a very small number of crops. These are some of its advantages and disadvantages.
Hydropnic gardening's Nutrient film technique involves placing a thin layer on the roots of nutrient solutions. This keeps them dry while providing enough oxygen. This technique is ideal for plants that are light and fast growing, but don't need much support. This is not recommended if your plants are top heavy as they will not grow as tall in this technique as they would in soil.
The Nutrient-film technique in hydroponix is the simplest of the two techniques. A channel is made with nutrient solution. The roots of plants grow in the channel. Flowing nutrients solution over the roots of plants creates a microclimate that encourages the growth of healthy, strong plants. It's also simple to use and suitable for both advanced and novice growers.
The nutrient-film technique is one the key principles of hydroponics. It involves a channel having sloped sides. Water is then pumped through the channel. The water in the channel is used to provide water for the plants. In the solution, nutrients are also dissolved. The setup is similar to that of the Ebb and flow method but involves the use water pumps.
NFT system
The NFT system uses a reservoir inside a grow tray with a pump at the top and a drain pipe on the bottom. A reservoir can be equipped with an external pump that connects to an air stone. This is very important because the plants will get the most nutrients and oxygen from the water they're growing in. The downside to the NFT system is that there's no automatic timer for this system. The pump runs continuously, which can be problematic if you're not able to turn it off during power outages or if your system fails.
Air stones are not required for NFT systems. Instead, the water levels must be kept low to ensure roots get oxygen. An air pump supplies oxygen to the water, which helps to prevent root decay. The slope of the reservoir should allow water to flow freely. A timer is used to control the pump's timing. The water in your grow channel should be sloped to prevent water from splashing.
NFT is ideal for fast-growing lightweight plants. Lettuce can be used as an example. Flandria and Ruby Sky are popular varieties. Some people have successfully grown perennial plants like strawberries in an NFT system. You may need to purchase an independent trellis system if your goal is to grow a larger crop.
NFT is an excellent technique for beginners and experts alike. This method is highly nutrient-rich, easy to maintain, and sustainable. You can also grow herbs or strawberries with this system. A few benefits of the NFT system include:
Ebb & flow system
You can grow plants using hydroponics' ebb-and-flow system. It supplies plants with oxygen, nutrients, and recycles your nutrient solution. Because your nutrient solution can be recycled continually, it's very cost-effective. Beginners may find the ebb and flow system intimidating, but after some practice, you'll be growing vegetables, herbs, and fruits in no time!
To grow plants, you can use rockwool or perlite. Coco coir can also be used, although it is not recommended. Soil retains moisture and does not expose the roots to the same amount of oxygen as hydroponics. Although a fluorescent "growstick", which costs less than $25, will not produce lush growth. You should opt for a 200-watt bulb.
The size of the tubing you use is important when selecting an Ebb-and-Flow. If you're planning to use a 3/4-inch fitting, you'll need tubing that is at least one-half inch thick. An appropriate substrate can be used for your growing medium. Consider buying a Coco Boss or Growcube block if you are using rockwool. Perlite mix can be used in pots, or grow cubes. Hydroton rock can also be used in a net pot.
Ebb & flow systems are simple to setup. The system uses two containers: a plastic bucket that is placed in the flooding tray and a pump to transport the nutrient solution from reservoir to tray. You can even use multiple buckets to improve growth, depending on what your plants need. You can also use a timer to adjust the level of each container if you don't have enough space.
FAQ
What type of lighting is best to grow plants indoors?
Because they emit less heat, floralescent lights are great for indoor gardening. They are also consistent in lighting, and do not flicker or dimm. Fluorescent bulbs come in both compact fluorescent (CFL) and regular varieties. CFLs consume up to 75% less electricity than traditional bulbs.
When is the best month to plant a vegetable garden in my area?
The best time to plant vegetables are from April through June. This is the best time to plant vegetables. The soil is warmer and plants grow faster. You might want to wait until July/August if you live in a cold area.
Which seeds should start indoors?
Tomato seeds are the best choice for starting indoors. Tomatoes grow quickly and bear good fruit all year. When growing tomatoes in pots, be careful when transplanting them into the ground. The soil could dry out if you plant too early. This could lead to root rot. Plant diseases like bacterial disease can quickly kill plants.
When should you plant herbs?
Herbs should be planted during springtime when soil temperatures reach 55degF. They should be in full sun to get the best results. Plant basil indoors by placing seedlings into pots containing potting mix. Keep them out of direct sun until they sprout leaves. Once the plants begin to grow properly, you should move them into bright indirect lights. After three to four weeks, transplant them into individual containers. Keep them hydrated.
What is a plant calendar?
A planting plan is a list of plants to be planted at different times each year. The goal is to maximise growth while minimizing stress. So, for example, spring crops such as lettuce, spinach, or peas should not be sown before the last frost date. Spring crops later include squash, cucumbers, summer beans, and squash. Fall crops include potatoes, carrots, broccoli, cauliflower and broccoli.
Statistics
- According to a survey from the National Gardening Association, upward of 18 million novice gardeners have picked up a shovel since 2020. (wsj.com)
- According to the National Gardening Association, the average family with a garden spends $70 on their crops—but they grow an estimated $600 worth of veggies! - blog.nationwide.com
- Most tomatoes and peppers will take 6-8 weeks to reach transplant size so plan according to your climate! - ufseeds.com
- As the price of fruit and vegetables is expected to rise by 8% after Brexit, the idea of growing your own is now better than ever. (countryliving.com)
External Links
How To
How to apply fertilizers to the folium
Foliar fertilizers are applied to plants directly by spraying. In addition to providing nutrients to the plant, they help increase photosynthesis, improve water retention, prevent disease, increase resistance against pests, promote growth and development, and provide protection from weather conditions. They can be used to treat all plants, including fruits, vegetables and flowers as well as trees, shrubs, lawns, and grasses.
When applying foliar fertilizers, there is no risk of soil pollution. The fertilizer required depends on the type and size of the plant as well as how much foliage it has. Foliar fertilizers should only be used when the plant is active growing. This will allow them to absorb nutrients quicker. When you're ready to fertilize your garden, follow these steps:
-
Be sure to determine the right type of fertilizer for you. Some products contain only one nutrient; others include multiple elements. Ask your local nursery or gardening center if you don't know which product you need.
-
Pay attention to the instructions. Before applying, please read the label. Spraying near windows or doors could cause damage. Keep pets and children away
-
If possible, use the hose attachment. Turn off the nozzle after each few sprays to avoid excessive spraying.
-
Be careful when mixing different types of foliar fertilizers. Mixing two different types can have harmful effects, including burning or staining.
-
Spray at least five feet away from the trunk. At least three feet should be spaced between the trunk of the tree and the edge where you plan on applying the fertilizer.
-
Before applying, wait until the sun sets before you do. Sunlight can cause light-sensitive chemicals in fertilizer to disintegrate.
-
Spread the fertilizer evenly among the leaves. Spread the fertilizer evenly over large areas.
-
Allow the fertilizer to dry completely before watering.