
Fall mums are a great addition to any garden. Mums like perennials and need the right growing conditions. Mums will produce more flowers if planted earlier in the year. However, if they are not planted by the end of the season they will not have time to establish roots and won't be able to withstand harsh winters. To get the best results, you should plant mums in the spring. To keep your mums bushy, make sure to pinch back any newly sprouted shoots. A bushy plants will produce more flowers.
Potted mums
You can plant mums in containers in the fall. You need to make sure that the mums are in the right conditions. They thrive best in soil that is rich in organic matter and has good drainage. If you notice that your mums' roots are too big, you can split them and transfer them to a larger container. Make sure your mums are not frozen before you pot them. They may not survive the cold.
For mums to be happy, choose a place that gets plenty of sun indirect and well-drained soil. It is also important to remember that mums do not tolerate too much dryness, so make sure that you place them in a spot that receives at least six hours of sunlight each day. Also, make sure you water them often. They require approximately one inch of water per week.
Potted mums bring fall color to any outdoor space once they have bloomed. These mums can be used as a cut flower garden plant or as a border for sunny areas. They can also be grown as perennials. Mums will be back each year with more flowers than annuals.
Place potted mums in a sunny area with six hours of direct sun each day to plant them. To catch water runoff and keep the soil moist, a saucer is a good idea. You must water your plants daily after they have been planted in a pot. You can mix potted mums in a variety of decorative gourds or pumpkins.
Mums are very thirsty plants and need to be given plenty of sunshine and water every day. You should water potted mums early in the day to avoid drying the leaves. Avoid putting them in a spot that is too hot as it will slow down their flowering cycle.
Potted moms are simple to maintain and can come in many different sizes and colors. Potted mums can last up to a few weeks and are very affordable if taken care of properly. People often throw away potted mums when they are done blooming. But with a little care potted mums can survive for years and still look great.
Transplanting mums
Mums make the perfect flower for fall and can also be cultivated from cuttings. Cuts can be easily transferred from one location to another by following a few simple steps. First, take out the leaves from the mum's bottom. Then, you can plant the cutting in a small jar of good-quality dirt. Dip the cutting into a rooting hormone to encourage regrowth. After the cutting has become roots, transfer it to another pot or garden.
Mums are perennials and prefer to grow in well-drained soil. When you transplant mums, remember to divide them to allow the roots to grow freely. If you're growing mums in containers wait until frost danger has passed before you transplant them. They must be kept indoors if they are not protected from frost.
Mums need at minimum six hours of sunshine per day. Potted mums should not be placed in poor drainage areas to prevent wilting. Modify the soil if it is rich in clay. The plants should be watered daily. They will not require fertilizer the first couple months. In the autumn, they will need fertilizer. To ensure that they thrive outside, you should fertilize them with a Schultz fertilizer every month. You can also protect your plants by mulching them.
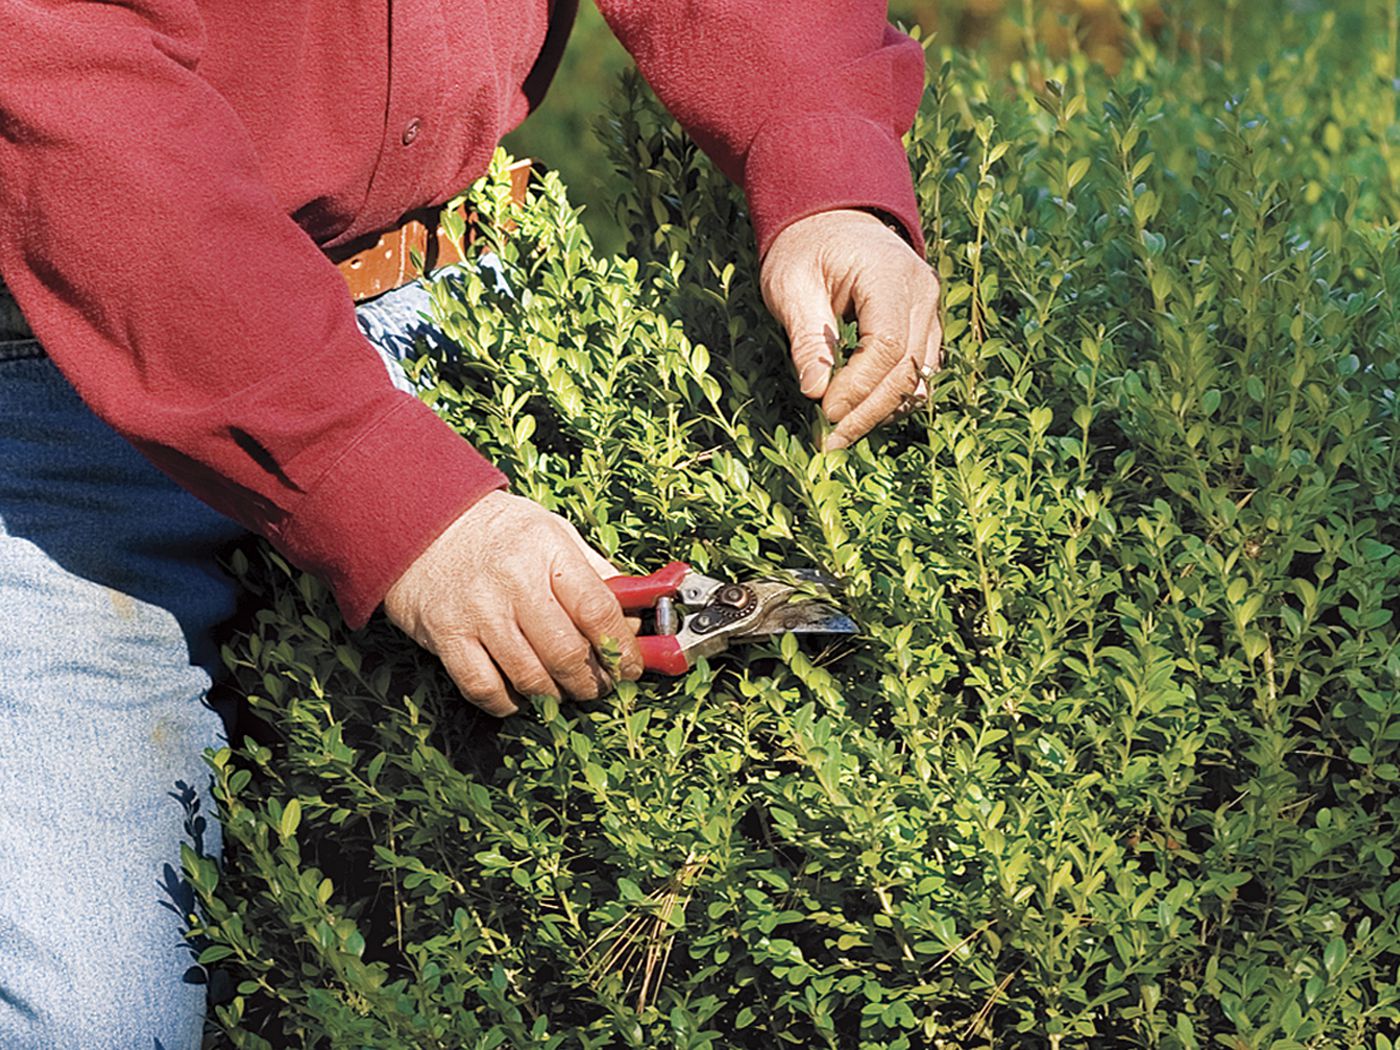
If mums are perennials, they should always be divided. They should be divided when there is new growth in the spring. Take out the center of the clump to separate the vigorous, new shoots. Fertilize the new shoots using slow-release granular fertilizer. To encourage compact growth, you can pinch back mums when they reach six inches in height.
If you're planting mums into pots, it is best to do this before the first snowfost. It is important to ensure that your mums are in a sunny area with well-drained soil. You should water them regularly. They will stay happy and healthy throughout winter by being watered regularly.
Once you've transplanted your plant, ensure that it receives six hours of sunlight each morning. For their flowering process to be successful, mums require plenty of sunshine. It is best to plant them in the spring and summer as they won't be able to survive in the summer heat.
Feeding mums before flower buds form
Mums are very heavy feeders, and need large quantities of nutrients in the first weeks of plant growth. Therefore, feeding them early is essential to ensure strong growth. To determine the optimal fertilization rate, soil testing should be done regularly. If the EC level of the soil is high, the mums are not absorbing enough nutrients to grow. Low EC levels indicate that the mums don't absorb enough nutrition. They will need to be supplemented.
Every three to four years, mums should be split. If the moms look too small or oddly shaped it is time for them to be divided. Their middle roots will become old and brittle, while their roots outwardly are healthier and younger. They may need to be split if the mums haven't grown in size over the last two years. They will not grow properly if the new mothers do not have enough roots.
It is crucial to feed fall mums in spring before the flower buds appear. Mums that stand will fare much better than mums that go to bed. Mulch is important because it retains moisture and protects roots from hard freezes. When new growth starts, it is important that you remove the dead stems. This will encourage the development of the habit by encouraging more flowers to bloom.
Mums love full sun or almost all day, but can take some shade. Mums that have too much shade may be stunted, and they may fall over when their flower buds form. In areas with warmer climates, mums do best in partial shade. Mothers who live in partial shade tend to be taller than mothers who live in full sun.
It is also important that you pinch the mums when they are in the ground. This will result in more branches and stems. You will not receive any flowers if you don’t pinch mums before the middle of summer.
Overwintering mums
Overwintering mums is relatively easy, but you must select the right type for your climate. Garden mums, which are true perennials, are hardy in growing areas 5 to 9. The first step in choosing the right kind is to choose the right one. Choose a plant which will bloom in autumn and survive the winter.
Mothers should be planted in well-draining soil to protect them from winter storms. If the soil is not well-draining, roots can freeze and die from standing water. Mums should be planted near structures that can withstand strong winter winds. The mum leaves will turn brown after frost has moved in.
You should water your mums often. You should concentrate your watering on the plant's base and not splash it on the leaves. This will allow the soil to dry completely before your next watering. Also, cover the soil with mulch, which will conserve moisture and protect the roots from extreme cold.
Although it is easy to overwinter mums in pots, it takes some effort. Mothers should be kept in a cool, dark place between 32 and 55 degrees Fahrenheit. If you live in a cold climate, you can put them in an unheated basement or closet, but they should never be exposed to temperatures below freezing.
Mothers can make beautiful spring blooms, but they must be protected from frosty weather in the winter. You can transplant them outside once they have reached this stage. You should remember that perennials require care in order for them to thrive and continue to bloom year after year.
Planting mums early is a crucial step to overwintering them successfully. To ensure that they can withstand the winter, it is important to plant them before the first frost. You can plant mums with buds to allow their root system to develop. Then you can protect them with burlap or straw mulch.
Plant mums in spring to ensure they have the entire growing season. They will have more time to establish roots and blossom in the spring, so they are better equipped to survive the winter.
FAQ
What should you do first when you start a garden?
When beginning a garden, the first thing to do is to prepare the soil. This includes adding organic matter like composted cow manure, grass clippings leaves, straw, and so on, which will help to provide plant nutrients. Next, plant the seeds or seedlings in the holes. Then, water well.
Which month is the best to start a vegetable gardening?
From April to June is the best season for vegetables. This is when the soil is warmest and plants grow fastest. If you live outside of a warm climate, you might be better off waiting until July or August.
What is the difference between hydroponic gardening and aquaponic gardening?
Hydroponic gardening is a method that uses water to nourish plants instead of soil. Aquaponics involves the use of fish tanks in combination with plants to create an eco-system that can self-sufficient. Aquaponics is like having your own farm in your home.
Can I grow fruit tree in a pot?
Yes! Yes, pots are possible to grow fruit trees if space is tight. Make sure your pot is drained to prevent the tree from getting rotted by excess moisture. You should also ensure that the pot is deep sufficient to support the root ball. This will help prevent stress on the tree.
Is there enough space in my backyard to grow a vegetable garden.
If you don't already have a vegetable garden, you might wonder whether you'll have enough room for one. Yes. A vegetable garden doesn't take up much space at all. It just takes some planning. You could make raised beds that are only 6 inches tall. Or you can use containers to build raised beds. You'll still get lots of produce.
What vegetables can you grow together?
Tomatoes and peppers can be grown together because they prefer similar soil conditions. They complement each other well since tomatoes need heat to ripen while peppers require cooler temperatures for optimal flavor. Start seeds indoors approximately six weeks prior to planting. Once the weather warms up, transplant the tomato and pepper plants outdoors.
Which seeds should you start indoors?
A tomato seed is the best for indoor gardening. Tomatoes are very easy to grow and produce fruit year-round. If you are growing tomatoes in pots, take care when you transplant them to the ground. The soil could dry out if you plant too early. This could lead to root rot. Also, be aware of diseases such as bacterial wilt, which can kill plants quickly.
Statistics
- Today, 80 percent of all corn grown in North America is from GMO seed that is planted and sprayed with Roundup. - parkseed.com
- According to a survey from the National Gardening Association, upward of 18 million novice gardeners have picked up a shovel since 2020. (wsj.com)
- 80% of residents spent a lifetime as large-scale farmers (or working on farms) using many chemicals believed to be cancerous today. (acountrygirlslife.com)
- Most tomatoes and peppers will take 6-8 weeks to reach transplant size so plan according to your climate! - ufseeds.com
External Links
How To
How to Start a Garden
It is much easier than most people believe to start a garden. There are many ways to start a garden.
One method is to purchase seeds from a local nursery. This is probably the easiest way to start a garden.
You can also find a plot for a community garden. Community gardens are located in close proximity to schools, parks, and other public spaces. These plots may have raised beds to grow vegetables.
You can start your garden quickly by planting a container garden. You will need a small container or planter to start your container gardening. You will then plant the seedlings.
You also have the option to purchase a ready-made gardening kit. These kits include everything you need in order to start your garden. Some kits even contain tools and supplies.
There are no set rules to start a garden. You are free to do what you like. Just make sure you follow some basic guidelines.
First, determine what type of garden design you want. Are you looking for a large garden? Or do you prefer to grow a few herbs in pots instead?
Next, decide where you'll plant your garden. Will you be using a container? Or will you be planting in the ground?
Once you decide on the type and size of garden you want, it is time to start shopping for materials.
Also, consider the space available to you. You may not have enough space for a large garden if you live in a small apartment.
After you have chosen the area where you want to plant your garden, you can begin. First, prepare the area.
This means that you need to remove any weeds or debris. Next, dig a hole for each plant. Make sure the holes are deep enough so that the roots won't hit the sides when they grow.
You can fill the holes with topsoil or compost. To retain moisture, you can also add organic matter.
After the site has been prepared, you can add the plants. You should not crowd them. They require space to grow.
As the plants grow, keep adding organic matter. This helps prevent disease, and keeps the soil nourished.
Fertilize the plants when you notice new growth. Fertilizer encourages strong root systems. It promotes faster and more robust growth.
Keep watering the plants till they reach maturity. You can then harvest the fruits and have fun!